A guide on how to model a curtain and animate it sliding along a curtain rail in AutoDesk Maya, using constraints and nCloth.
Create a poly plane and set its subdivisions to 30, 10. Rotate the plane by 90 in X:

With the plane selected (and the modelling menu set active) go to “Deform > Nonlinear > Sine”

Select the sineHandle in the outliner, click on the sine1 input node in the channel box and enter the values:
Envelope: 1
Amplitude: 0.1
Wavelength: 0.2

Update the rotate XYZ values for the sineHandle to 0, 90, 90:

Parent the sine deformer to the plane (drag the deformer into the plane in the outliner) so that the deformer will move with the plane:

Select the FX menu set:

Select the plane and go to ‘nCloth’ > ‘Create nCloth’:

Create a new plane and set the subdivisions width and height to 1:

Switch to the top view and resize the new plane to the size of the curtain:

Then switch to the side view and move the new plane up to the top of the curtain (It might be useful to switch to wireframe to get the perfect position):

Duplicate the new plane and rotate it 90 degrees along the X axis:

Select the central vertices of the original curtain plane, and one of the new planes we created:

Open the FX menu set (top left dropdown), and go to ‘nConstraint’ > ‘Slide on Surface’:

Select the ‘dynamicConstraint’ node in the outliner, and expand the ‘dynamicConstraintShape’ node in the channel box:

Modify the values:
- Strength: 40
- TangentStrength: 10
- LocalCollide: off

Repeat the nConstraint steps for the other plane we created (and rotated 90 degrees) and apply the same values to the dynamicConstraint2 node that is created as a result:

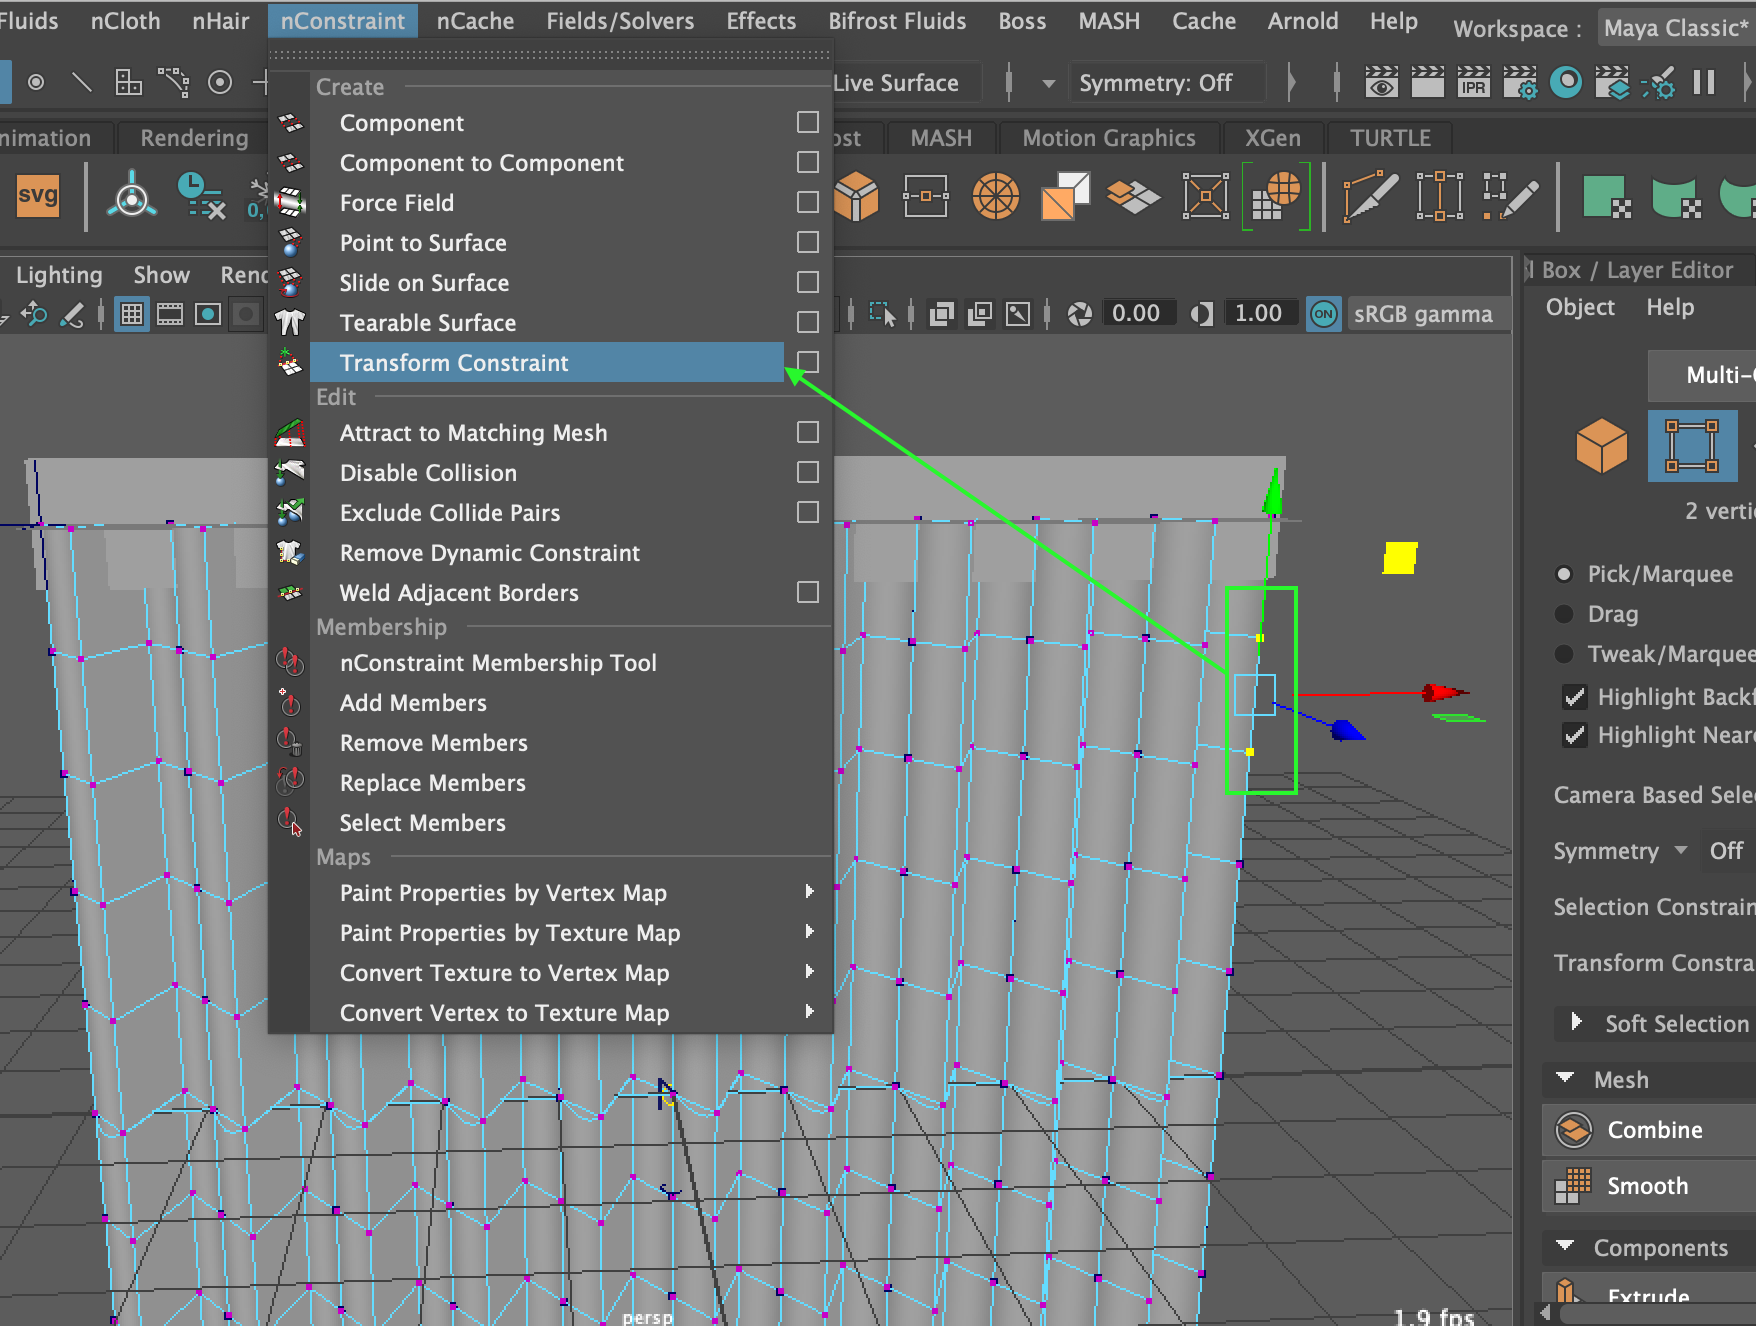
Select the top left point of the curtain and select ‘nConstraint’ > ‘Transform Constraint’, this will stop the curtain flying off the end of the rail:

Select a couple of points on the right side of the curtain and apply another transform constraint, we will use this to slide the curtain:

Now lets animate!
Select the ‘dynamicConstraint4’ in the outliner
Make sure the time slider is on Frame 1
In the channel box, right-click the Translate X channel and select ‘Key Selected’

Move the time slider to frame 50
Use the handle on the dynamicConstraint4 node in the viewport to move the constraint along the X axis
Again right click on the Translate X channel in the channel box and again select ‘Key Selected’:

Now rewind the time slider back to frame 1 and press play! The curtain will slide open: