Hover the mouse over the network editor:

Press TAB on the keyboard to reveal the menu:

You can begin typing to search for the node you are after:

Start typing ‘geo’ and select the geometry option when it appears, place the node in the network editor:

We can now add objects to the new geometry node, double click on the node to enter the network specific to that node, it will be empty at this point:

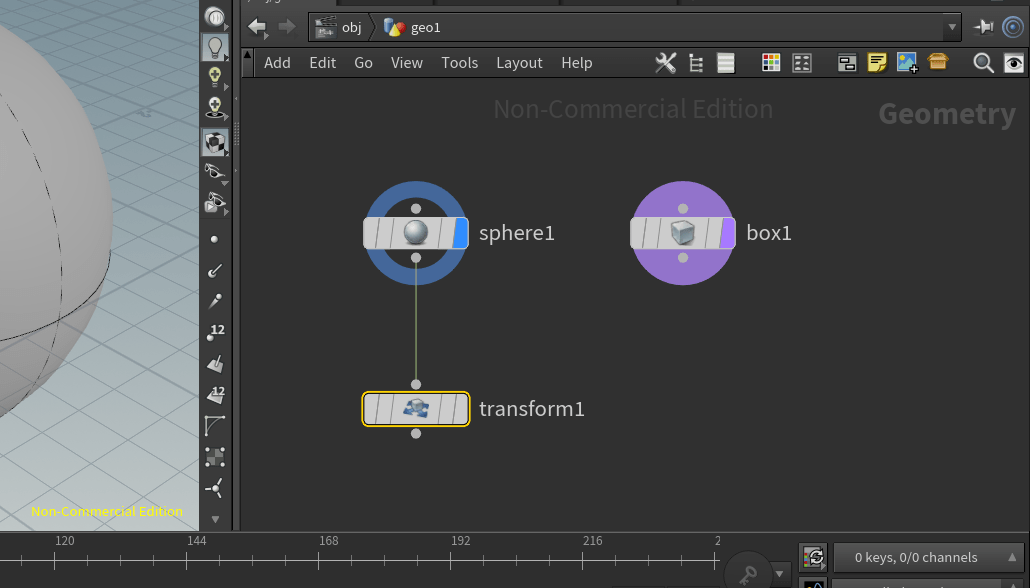
Hit TAB within the network editor, and insert a box, then do the same for a sphere, you should see the below result:

You’ll notice that the sphere object has 2 circles highlighting it, blue and purple, the blue circle represents the viewer and the purple one represents the render view.
To move the circles to another object, click on the outer blue shaded section of the node:

You can move the render circle (purple) alone to another object, hold T and drag to select the sphere object:

You’ll notice that the sphere is not visible in the viewport, and the box is? This is because the purple circle represents the render view and the blue circle represents the viewport. If we switch to the render view:

You can see that the sphere is visible and the box object is not:

This is consistent with what we have defined in the network editor, we have chosen to display the sphere at time of render (purple circle), and the box in the viewport (blue circle).
Create a transform node on the sphere object by hitting TAB and selecting the transform node:

Click and drag to connect the sphere to the new transform node:

Click to move the viewport circle to the new transform node:

Hold T on the keyboard and select the transform node to also move the render circle (purple) to the transform node:

With the transform node selected, click on the manipulator tool to reveal the manipulator handles:

Grab the object by the X handle and move it off centre:

If you want to also see the box object, click the template button for the node in the editor (a pink circle will appear) and a ghost image for that object will display in the viewport:
