Create a simple geometry to the network editor and add objects to it (in this case a box and a sphere):
If you need help on creating objects, see this post
Initially, we can only see 1 of the objects in the geometry as it has both the render and viewport flags:

But how about if you wanted to see both objects in the viewport and the render view?
Press TAB in the network editor and type ‘merge’, select the Merge node and place it in the editor:


Click and drag the output of both objects to the input of the merge node:

Click on the display/render option of the merge node to assign it both the render and node flags:

Now not only will both objects be visible in the viewport, but also in the render:

Multiple Merge Nodes
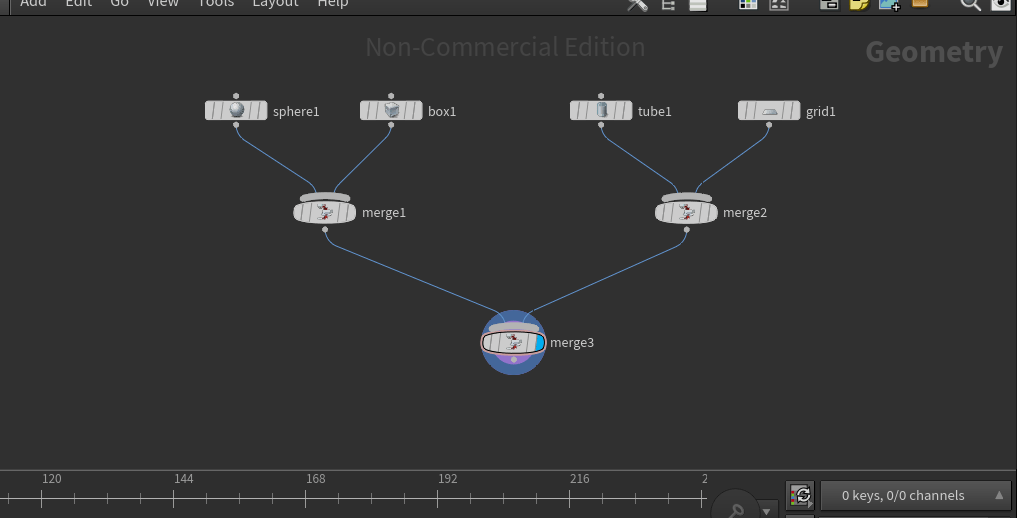
Add 2 more objects to the geometry set:

Create another merge node (TAB > Merge).
Connect the 2 new objects to the new merge node:

Create a 3rd merge node, and connect both previous merge nodes to its input then click on the display/render flag option:

All of the objects will now appear in both the viewport and render:

Adding Transform Nodes
As we can see in the above example most of our objects overlap, to see them more clearly we can add transform nodes to the network to alter the object positions.
In the network editor press TAB and type Transform, place the new transform node in the connection between one of the objects and the merge node:

With the transform node selected, move the object. Do this for each object until none overlap:

Disconnecting Nodes
To disconnect nodes, hold Y on the keyboard, left click and drag to cut the connection.
