So you’ve created an awesome object in Maya, you’ve nailed the topology and smoothing and you are ready for the next step.
At the moment your object looks like its made of smooth concrete with the standard Maya material applied.
A Material is comprised of several pieces of information, these pieces of information are conveyed by Maya through a ‘Shading Network’.

The shading network shows each of the attributes, represented as nodes which define the final material. In the example above the material_example node on the far right represents the final output of the network.
You’ll notice on the network diagram that each of the lines include a small arrow, with arrows pointing in the direction from each node towards the next in the overall direction of the final material.

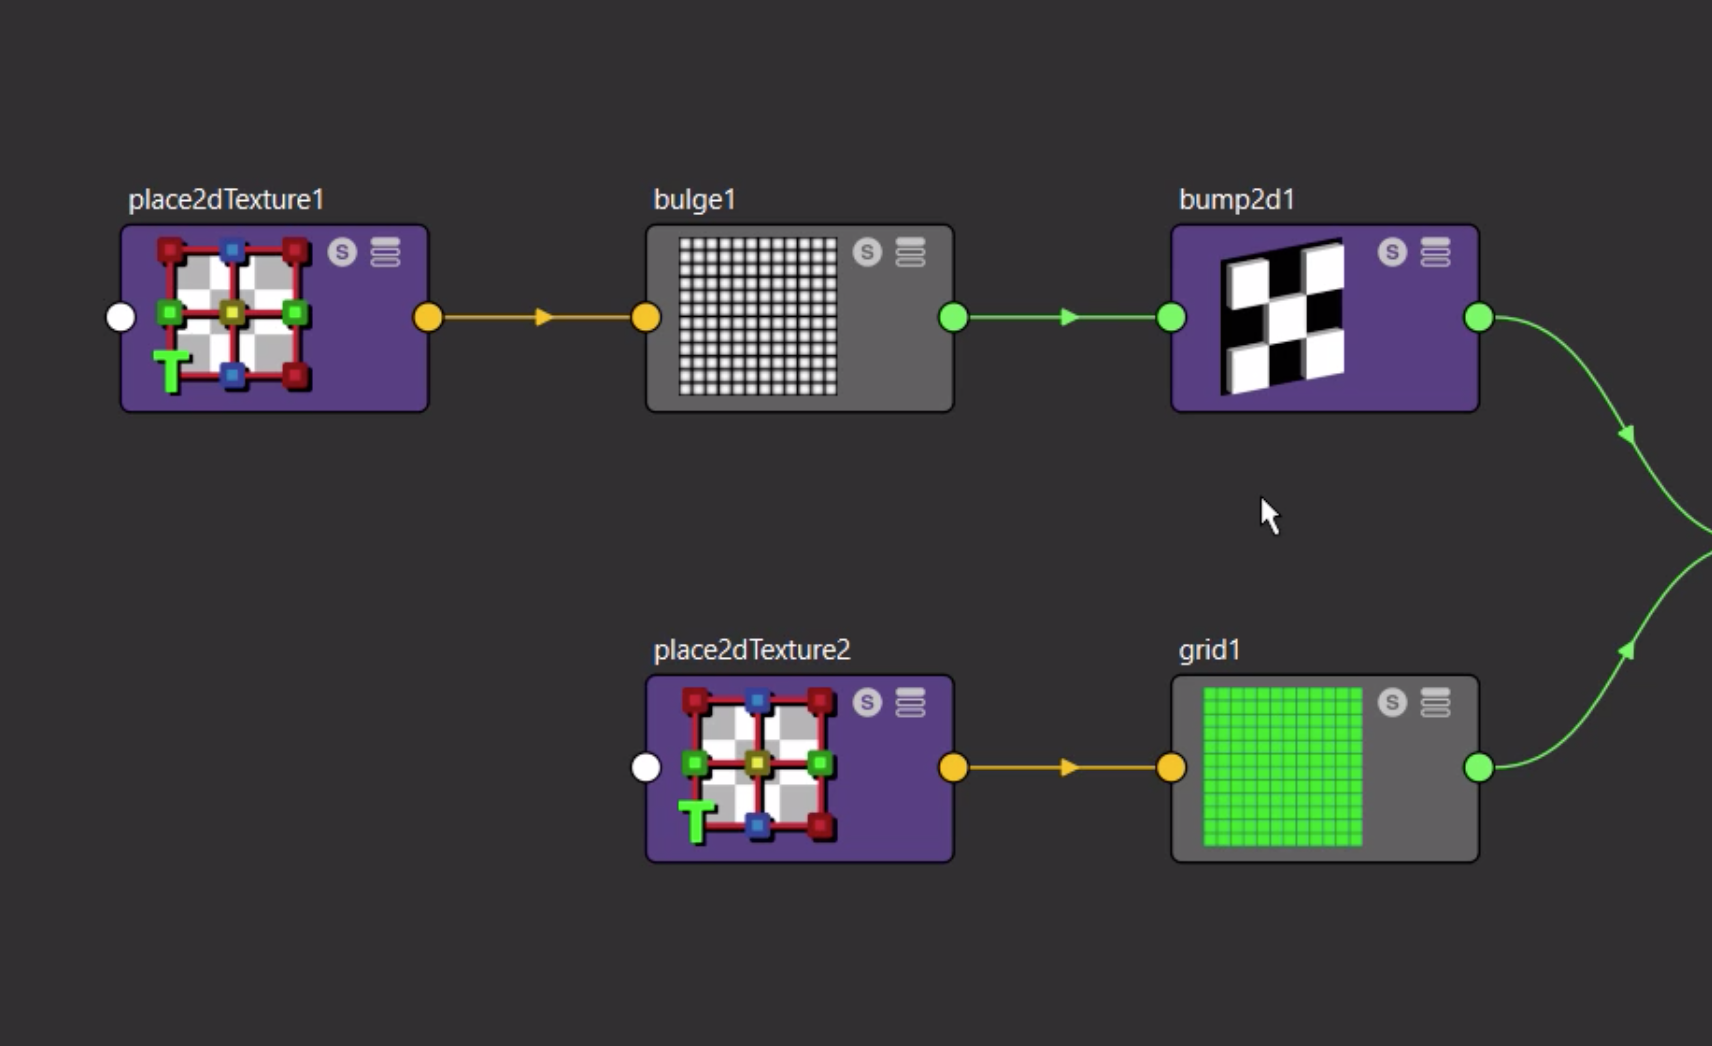
When working with shading networks you may hear the terms ‘Upstream’ and ‘Downstream’, these terms are relative to the direction of the arrows. For example, lets consider the below shading network:

The ‘bump2d1’ node is upstreamfrom the ‘material_example’, but downstreamfrom the bulge1 node with the material_example being at the end of the stream.
Each of the nodes on the network is responsible for applying a specific look to a material. Let’s take a look at some of the nodes.

Place2dTexture
The place texture node controls things like size, scale and repetition of the texture onto a material. It does not contain a texture itself, rather defines how the texture will be placed.
Grid1
The grid1 node contains the colour information for this stream through to the final material. As we can see in the example the node contains a series of lines at equal spacing filled with a green colour to create a grid.
The place2dTexture and grid nodes describe the colour information for the material, in this case a grid with defined attributes to display it as we see in the final material.
The top branch of the network defines the perceived topology of the material (bumpy, bulgy bits).

Bulge1
Using a texture defines where to apply bumps to our material. This is fed into the bump2d1 node.
Bump2d1
Tells Maya how much bulge we want on the material.
Place2dTexture1
Serves the same purpose as the place node on the bottom branch but its connected (and applies) to the bulge texture, defining and placement attributes.