When we create a new smoke emitter, a pyro sim node is added to the global network (see below),

If you double click the node to expand its internal network:

Lets take a deeper look into some of these nodes and how their properties impact the overall simulation.
Pyro (Smoke Object)
The first option is ‘Two dimensional’, enabling this will convert the smoke sim into 2 dimensions, which is much faster to sim in the viewport than 3 dimensions are is useful when building scenes as you don’t want to be waiting hours (if it can be helped) for the sim to complete:

The volume source node provides the information from the emitter object to the pyro solver.

The resize container node does what is says on the tin, its responsible for resizing the container as the simulated smoke grows, up to a maximum size, for example this is at frame 20:

The container is quite small, holding the smoke sim within it, but if we proceed forward to frame 60:

The sim has grown to the maximum size of the container and is ‘hitting the top’.
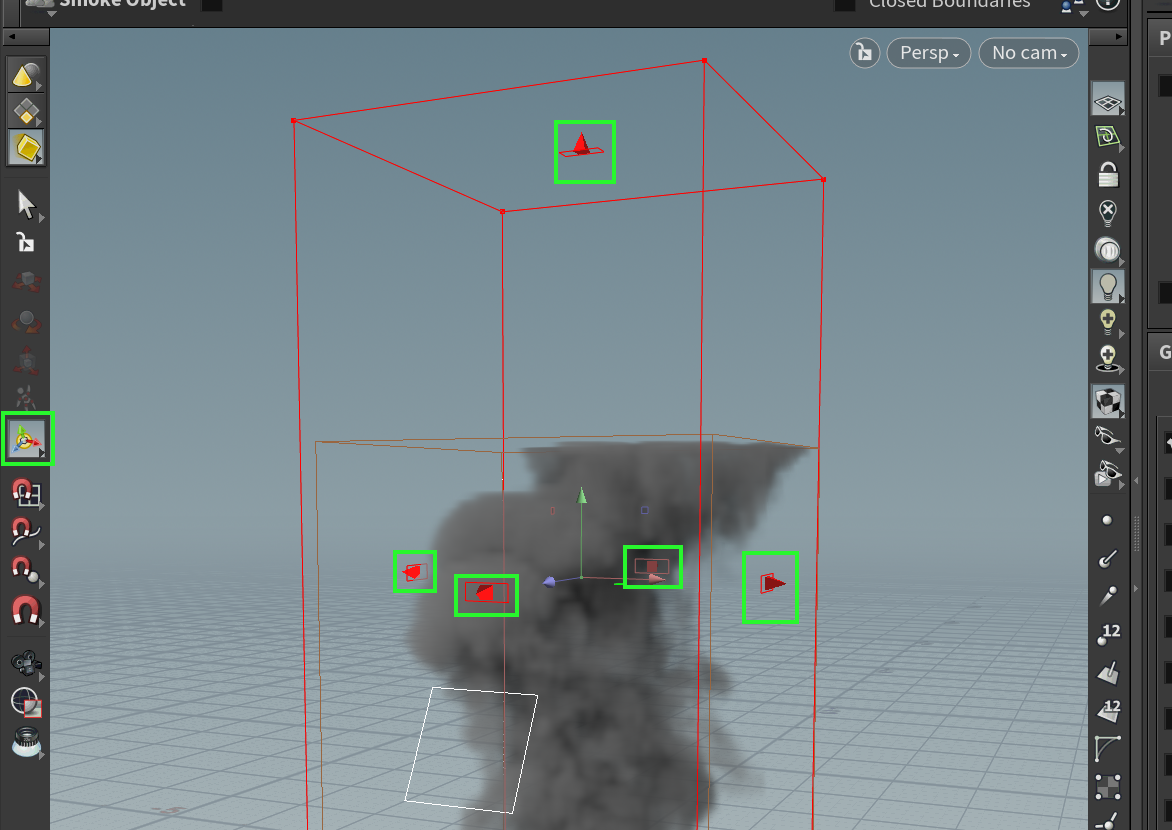
If you want to make the container bigger select the pyro node:

Activate the manipulator tool and drag the red arrows to increase the container boundaries:

Then if we play the sim again we can see that the ceiling has been raised:

Pyro Solver Node
Buoyancy lift and direction, the lift is how fast the smoke rises, and the direction fields refer to the XYZ values, enabling you to control the direction of the emitted smoke.
Shape tab
Dissipation: This is how quickly the smoke dissipates into to air.
Disturbance: Adds more detail to the smoke
Turbulence: Adds air turbulence to the smoke