Select all of the control curves you want to apply the animation clip to.
Tip: If you deselect the ‘Select surface objects’ option, you then wont be able to select objects (poly/nurbs) which include a surface, then click and drag in your scene to select multiple control curves:

Open the time editor – ‘Windows > Animation Editors > Time Editor’.
In the time editor either select ‘File > Import Animation Clip’ from the main menu or click on the ‘Import content from external files’ option:

Navigate to the required clip (.mb) and click ‘Open’.
Click ‘Apply and Close’ on the ‘Rename Namespaces’ dialog to return to the Time Editor.
The clip will appear in the time editor:

Now lets add another clip, go to ‘file > Import Animation Clip’
Select the 2nd clip, select ‘Open’ then ‘Apply and Close’
The new clip will be visible in the Time Editor, click and drag the clip to the end of the previous clip (so one flows into the other):

Note: Where we have 1 clip followed immediately by a different animation cycle we may see a “Pop” when the first one ends and the second one abruptly starts. This can be fixed:

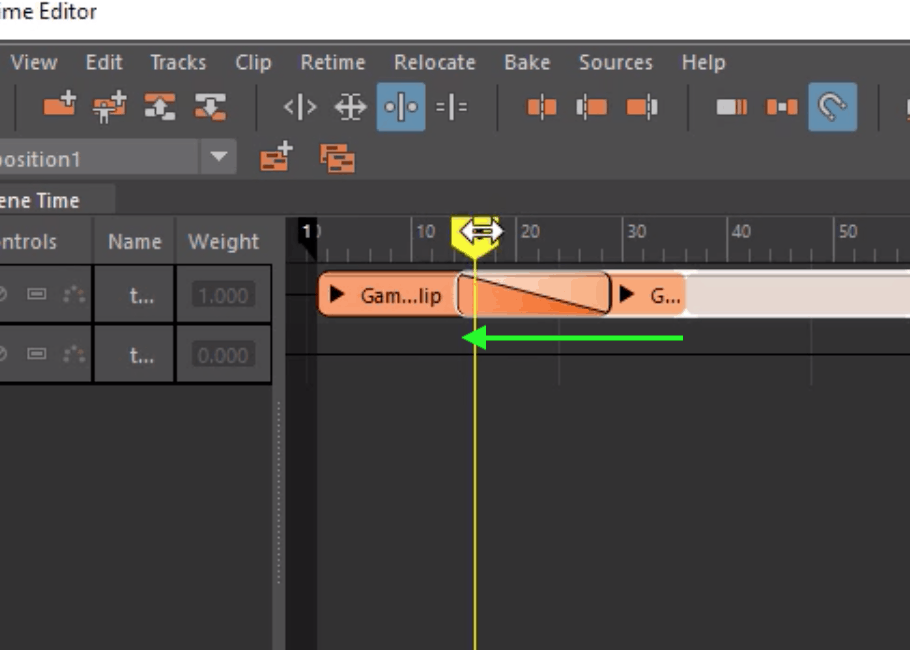
Select and drag the 2nd clip to the same ‘track’ as the first clip.
With the 2nd clip selected, drag it into the first clip, this overlap is represented in the UI by a diagonal line and it Maya creating a ‘blend’ between the 2 clips:

You are unlikely to get the blend perfect 1st time, so keep adjusting the blend depth by dragging the clips together and testing the animation:

Editing the clips as a group
Sometimes you may not get the desired results, perhaps the transition between the clips looks clunky and need further refinement.
Press CTRL + G to group them together:

With the group selected, go to ‘Bake > Bake to Scene and Delete’, we want to bake the clips back into keyframes and delete the clips.

You should now see the keyframes in the timeline for both clips:

From here you can fine tune your animation.