This technique is commonly used for vehicles moving along a track or road. Think of how difficult it could be keyframing an animation along a track of a rollercoaster.
We want to use Maya’s ‘path constraint’ to specify the path of the animation.
Firstly we’ll create the object we want the animate, in this case it’s a simple cube:

Then we create the path that we want the object to follow, we’ll use a CV curve (Create > Curve Tools > CV Curve Tool):

Hold X and click just in front of the cube object (holding X will snap to the grid, ensuring in this case that we are aligned with the centre of the object):

Hold X again and click further along the line to create the 2nd point:

We can now click and add several more points (without holding X) to create a longer and more exciting path:

When you are happy with the path hit “W” to commit the path and go back to our select tool on the object:

If you switch to a different view (perspective, side etc) you can select the curve point and move them around in space, Maya will automatically apply the smooth curves:

Be sure to select the animation menu set:

Select both the object/control and the path, then in the main menu select ‘Constrain > Motion Paths > Attach to Motion Path’ and click the option icon:

Lets take a look at some of the options:

Time range options
Time slider: Apply the path for the length of our animation
Start: Start animating along the path from a starting point, until the end of the animation
Start / End: Specify a start and end frame for the animation
Front Axis : This is the direction of travel, if we look at our example from the top view we can see that the forward axis is the

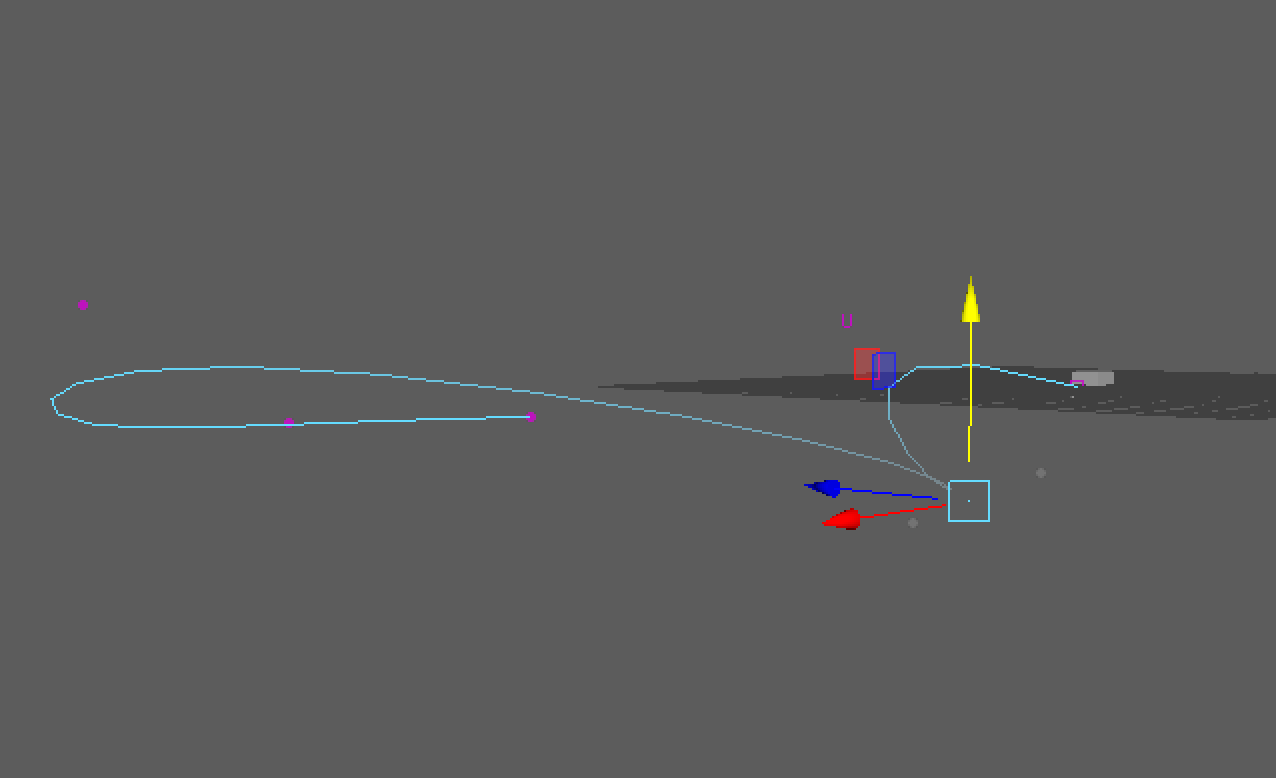
Hit ‘Attach’, you’ll notice that the object snaps to the start of the path. I’ve taken a screenshot in wireframe to show the start of the path snapped to the centre of the object:

If we now play the animation we can see the object moving along the path:
Additional Options
If we select the object and open the channel box, then click on the motionPath input:

There are a number of options for our motion path, most relate to the twist (pitch, roll, rotate) of the object along the path. Its best to experiment with these.
You may have noticed in the video that the object speed increases quite slowly then decreases before the end of the path. Let’s change that so the object actually speeds up more towards the end.
To do this open the Graph Editor (Windows > Animation Editors > Graph Editor), which will display our animation in a function curve:

You can see that towards the end of the animation the curve starts to level out, as the value of the animated channels increases at a slower rate as we travel through the animation frames. What we want to do is adjust this curve so that it gets steeper the closer we get to the end of the animation:

The resulting animation will see the object slowly accelerate and then increase at a steady speed until the end of the path: