Create a simple animation, in this example we’ll just be moving a ball using 2 keyframes (1 and 10):

Make sure to reduce the number of visible frames in our animation, we wont be needing the default 120, I’ve reduced this to 20 for both the visible frames in the timeline and the actual animation:

We also want to return the ball to its original location at the end of this loop to give the animation a seamless appearance, I’ve created another keyframe at frame 20, and returned the ball to the same ‘translateY’ value as frame 1:

Now that we have our basic animation we can increase the frame count back up to 120 so that we can see our looping animation in action:

Open the graph editor (Windows > Animation Editors > Graph Editor) and select the channel (or channels) we have animation curves for (in this example the channel we want is

Drag and select in the graph editor to select all of the keyframes:

Then from the menu select ‘Curves > Pre Infinity > Cycle’:

It doesn’t look like much has changed on the graph editor, we need to select ‘View > Infinity’ to enable the representation of our looped animation in the graph editor:

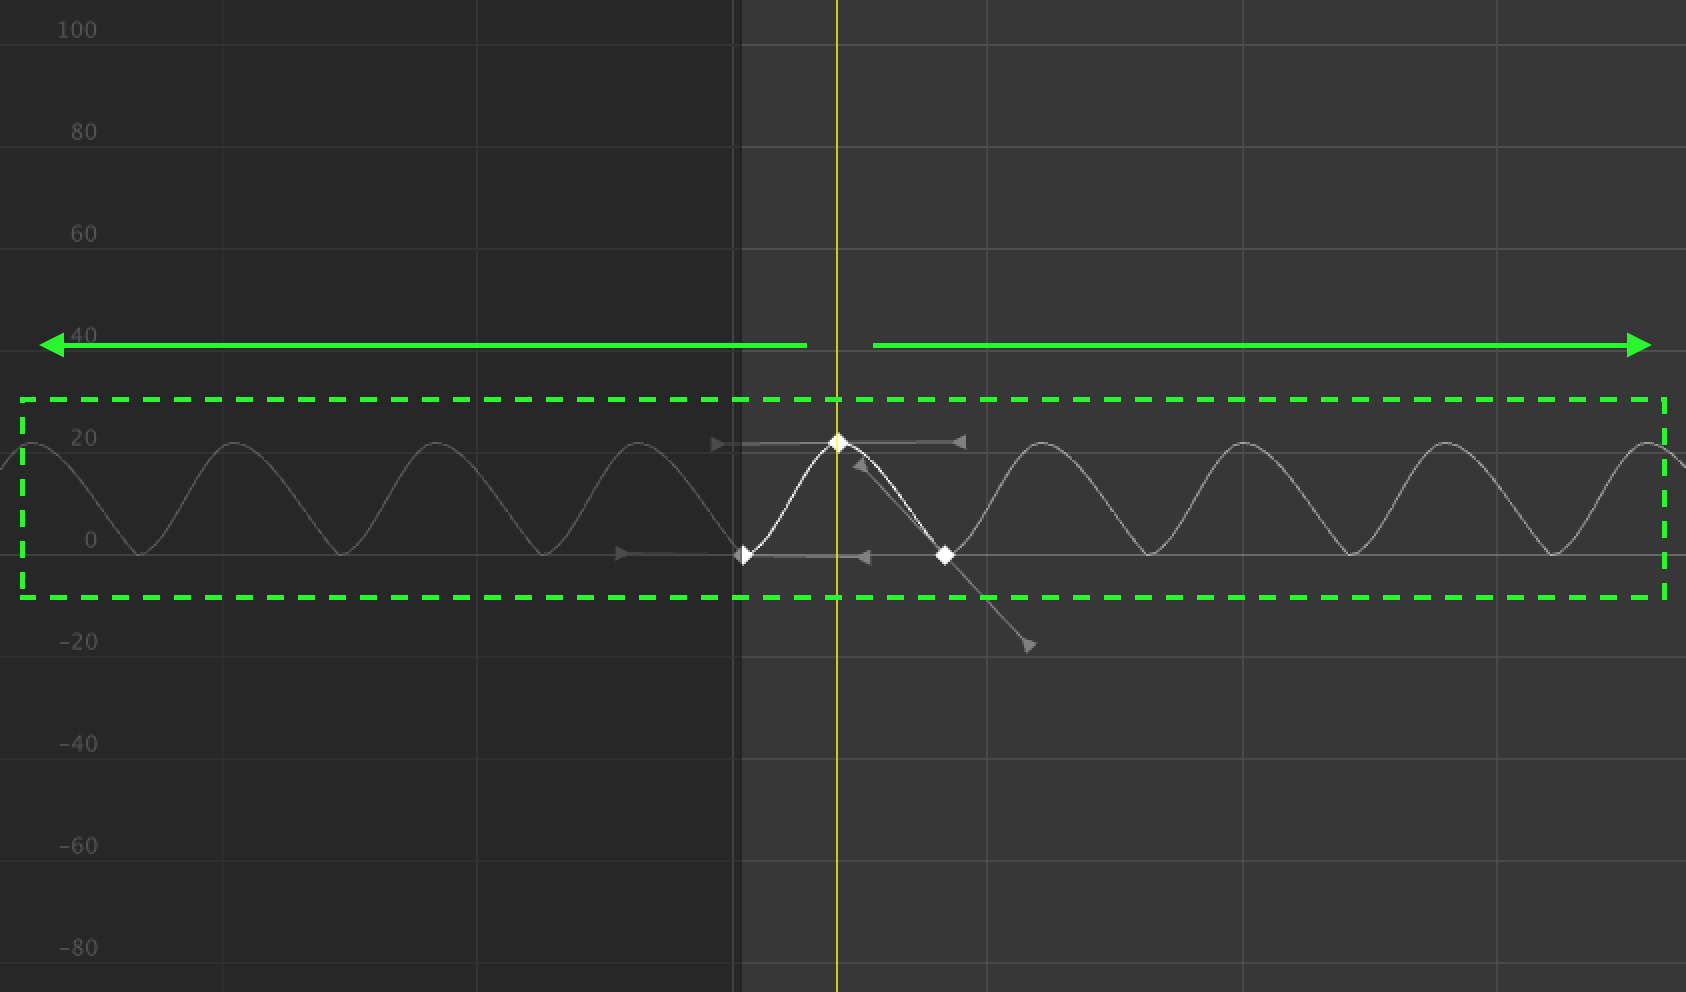
Now if we zoom out a little bit on the graph editor, the looped curve will visible:

There is a slight problem with this, and we need to make 1 more change. The graph above only shows the animation looping into the past?
This is because we selected ‘Pre infinity > cycle’ from the ‘Curves’ menu, we now need to do the same for ‘Post Infinity’. In the Curves menu select ‘Post Infinity > Cycle’. You’ll notice that the graph editor will now be updated to show our animation curve being repeated in both the past and future:

Now if we play the animation our ball movement will repeat. We can still see our animation keyframes in the timeline:

