In this post, we’ll take a look at the Tangent Types used in the animation Graph Editor to fine-tune your animations.

1 – Auto Tangents
The default option, the result will be what you can already see in the graph, Maya will rotate the tangent handles based on the keyframes before and after it. We can see this in effect by adding a new keyframe to the middle of our current standard curve. Maya wants to create a nice smooth curve by default:

To demonstrate this further if we move the keyframe UP to the same ‘value’ as the first keyframe, the tangent handles will rotate until they are level (again this is Maya attempting to give us a nice smooth curve):

Note: Given the example above, we actually have no animation between the first and middle keyframes, because the curve is flat along the value axis, so as we travel through time, our channel value remains the same.
Likewise if we move the keyframe down the tangents will again adjust:

2 – Spline Tangents
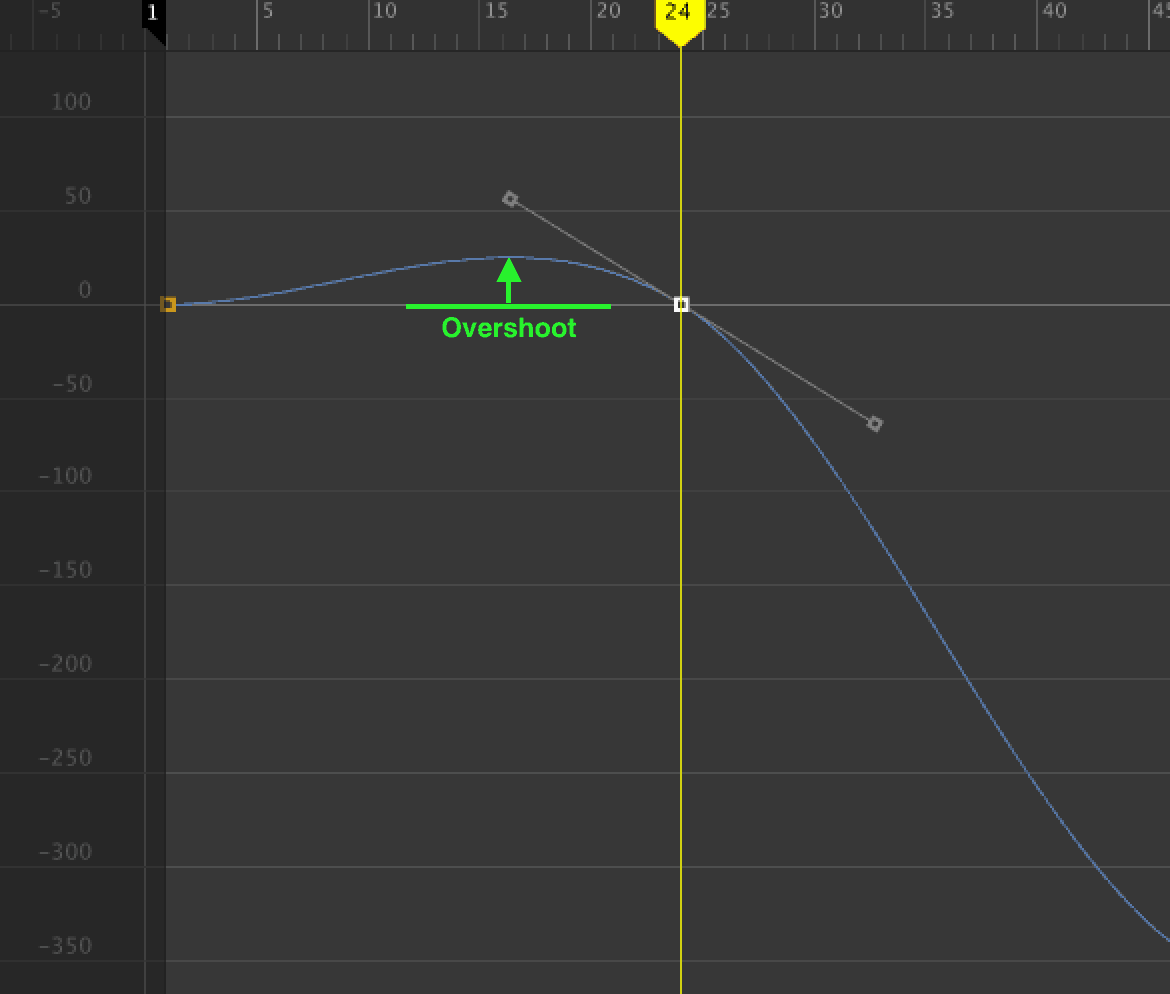
This tangent type will not rotate the handles when we move the keyframe but WILL try to maintain a smooth curve between keyframes, this time if we move the keyframe up to the same value as our first keyframe we will not get a flat function curve between the 2 frames:

This is the effect of the tangent handle remaining at the same angle while we move them, plus Maya trying to maintain a smooth curve.
Note: In animation the above example is creating an ‘overshoot’, where the curve of the animation extends beyond the keyframes:

3 – Clamped Tangents
Flattens out the handles when you get to the same value as another keyframe. If we start with this function curve (I’ve added the values to make this example a little easier to understand):

Our selected key is highlighted in white. If we move this key down, when we reach the same value as the next key, the tangent will flatten out, this prevents an overshoot:

If we go beyond this point, the curve will return:

4 – Linear Tangents
Creates a linear function curve, where there are in fact no curves at all. If we take an example curve with 3 keyframes, select all frames and press the Linear Tangents option:

You’ll see that the curves have all be flattened out. This is useful for situations when you need to animation an object whose value need to animation at a steady and constant motion, and not include any easing.
5 – Flat Tangents
This tangent type maintains a flat tangent handle even as you move the keyframe:

If you then adjust one of the tangent handles, the associated handle will move to maintain the flat tangent:

6 – Step Tangents
Converts the curve between 2 keys into a step:

This will maintain a fixed value between the key we applied the step tangent to, and the next key. The next key will keep the value for this channel, creating a ‘pop’ effect.
7 – Plateau Tangents
This tangent type is very similar to the clamped type, where the tangent handles are flattened to match the key of the same value. Y

As we move closer to the equal value of the next key the handles will automatically flatten out:

Detaching tangent handles
One other useful tool is the ‘break tangents’ option, this releases the tangents for a selected key from each other, allowing you to move them independently:
