The basics of keyframes in Maya for animations.
Keyframes set a point in time for a specific value of a channel.
Shortcut key for adding a key: S
Warning! This adds a key for all channels, we’ll cover adding keys for specific channels below.
For the benefit of this tutorial we are going to set our update view to “All”, so that we see the basic animation running in all of our view panels:

To do this, open the animation preferences panel by clicking on the “man running and gear icon” in the bottom right of the Maya interface:

Select the “All” radio button under the “Update view” option:

Also double check that the playback speed is set the 24fps, if not then update it now:

Save these settings.
This might also be a good time to confirm that we have the Animation option selected in the top left dropdown so that you have some of the animation related menus displayed at the top of the UI.


Let’s create an object in our scene, Ill create a sphere for this tutorial. Make sure that in the timeline we are at frame 1:

With our object selected, go to ‘Key’ > ‘Set key’:

You’ll notice that a keyframe has been added to the timeline (represented by a red line):

And if you look at the channel box (with the object still selected and the timeline on frame 1), You’ll notice that the transform channels also have a red line:

We are saying that, at frame 1, we want all of the channel attributes to be set to these values.
But what if you only wanted to set a keyframe for 1 channel? We’ll use translate X as an example.
Click to select the channel:

Alt / Right click on it and choose ‘Key selected’ from the menu:

Then only that channel will have the red line to represent a key is applied:

And a key will be added to the timeline for this channel:

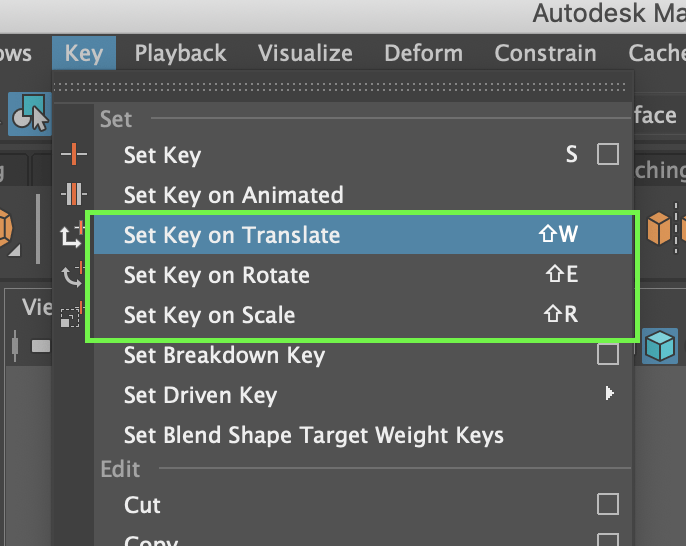
You can also use the main menu to set keys on specific channel groups (Translate, Rotate, Scale):
